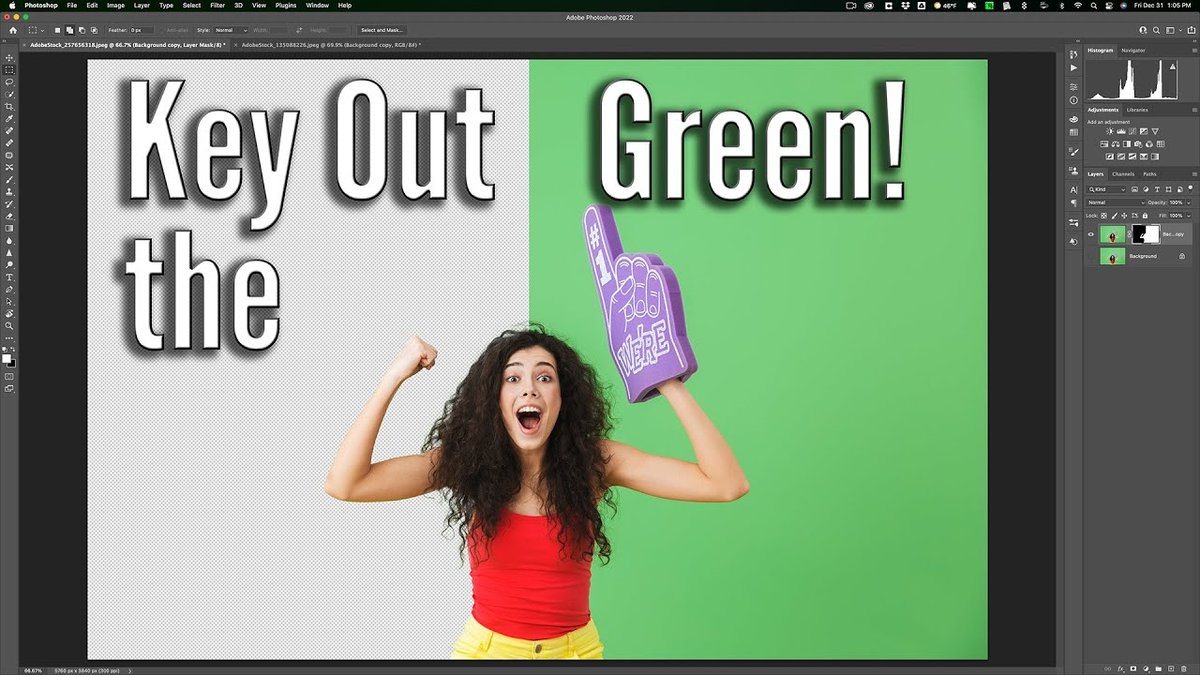
Ever marvel at how blockbuster movies transport actors to fantastical realms, or how local news anchors effortlessly stand in front of dynamic graphics? That magic often begins with a green screen, a humble backdrop that unlocks infinite possibilities in post-production. But while the concept seems simple – film against green, then swap it out – achieving a seamless, believable composite is where the art (and potential for error) truly lies. If you've ever wrestled with fuzzy edges, ghostly reflections, or backgrounds that just don't quite "stick," you know the frustration. The good news? Preventing future green screen errors often comes down to mastering a few fundamental, yet crucial, principles in your setup, lighting, and even wardrobe.
This guide is your roadmap to banishing those production headaches. We'll dive deep into common pitfalls and arm you with the actionable insights you need to capture footage that practically keys itself, saving you countless hours in the editing suite and elevating your visual storytelling.
At a Glance: Your Green Screen Success Checklist
- Measure Meticulously: Ensure your green screen is large enough for all movement, with curved transitions at walls and floor.
- Perfect the Panel: Keep your green screen pristine – no wrinkles, tears, chips, or stains.
- Light It Right: Use multiple, diffused lights for even screen illumination, minimizing shadows from subjects.
- Watch for Wardrobe: Absolutely no green clothing or shiny accessories.
- Distance is Key: Keep subjects at least six feet from the screen to reduce green spill.
- Strategic Framing: Match camera perspective to your intended background; use portrait mode for static full-length subjects.
- Subject First: Light your subject to match the background, then adjust screen lighting without compromise.
- Deep Focus: Use a greater depth of field (F8-F11) for sharp subjects and backgrounds.
- Mind Your Mode: Often, standard video gamma keys better than LOG for green screen work; expose brightly if using LOG.
- Control Motion Blur: Higher shutter speeds and frame rates can help with fast-moving subjects.
The Foundation: Getting Your Green Canvas Right
Before you even think about hitting record, the physical green screen itself, and the space it occupies, are your first lines of defense against post-production nightmares. Think of it as preparing your canvas before painting a masterpiece.
Measuring Your Canvas: Getting the Green Space Right
One of the most common oversights is simply not having enough green. It sounds trivial, but a green screen that’s too small for your subject's movements, or one that creates awkward hard edges, is a recipe for trouble. Imagine trying to film a dynamic commercial where subjects walk across a set, only to find they step off the green screen into a visible wall or floor. That's an instant "re-shoot" trigger.
The Fix:
Carefully map out your shooting space. Consider how much your subjects will move. A sitting interview demands less green than a full-body action shot. For any shot involving wide angles or significant movement, extend your green screen material not just across the wall, but onto the floor and even up the side walls. Crucially, aim for curved junctions where the floor meets the wall. These gentle curves, often created with coving or by simply draping fabric smoothly, prevent sharp lines and shadows that are notoriously difficult to key out cleanly. Hard corners scream "fake set" and disrupt the illusion.
The Unblemished Backdrop: Fixing Damaged Green Screens
A pristine green screen is non-negotiable. Any tear, wrinkle, chip, or stain isn't just an aesthetic flaw; it's a direct threat to your keying efforts. Wrinkles create unwanted shadows and highlights, varying the green tone across your backdrop. Chips in painted walls reveal the underlying material, and stains introduce completely different colors. All of these anomalies demand tedious manual masking in post-production, wasting precious editing time.
The Fix:
Treat your green screen like a delicate instrument. If it's a fabric backdrop, iron or steam it thoroughly, or hang it vertically well in advance of the shoot to let gravity do the work. Rolling fabric backdrops tightly instead of folding can also prevent creasing. For painted green walls, regularly inspect for damage. Chipped or scuffed areas need to be repainted with the exact same chroma key green to maintain color consistency. Keep the screen clean, free from dust, footprints, or any debris that can alter its color or texture.
Mastering the Light: Your Most Powerful Tool
Lighting is arguably the single most critical factor in achieving a flawless green screen composite. It’s where most errors are born, and where most solutions lie. Getting it right prevents a cascade of other problems, from fuzzy edges to glaring reflections.
Banish the Shadows: Achieving Even Illumination
Shadows cast by your subjects, props, or even your equipment are a chroma key killer. A single, powerful light source might seem efficient, but it inevitably creates harsh shadows on the screen, causing dark spots and an uneven green tone. Conversely, overexposing parts of the screen can lead to blown-out "hotspots" where the green color data is lost, making it impossible for the software to identify and remove. Both scenarios make for a challenging, if not impossible, key.
The Fix:
- Distance is Your Friend: The golden rule here is to create ample distance between your subjects/props and the green screen – ideally six feet or more. This separation helps prevent shadows from falling onto the screen. Make sure no wires, equipment stands, or other items are accidentally casting shadows onto your green area.
- Multiple, Diffused Lights: Ditch the single harsh spotlight. Instead, use multiple, soft, diffused light sources to illuminate the green screen evenly. For a basic setup, position two lights on opposite sides of the green screen, a few feet away, angled slightly inward. Adjust their power and angle until your screen glows with a consistent, shadow-free green. For larger sets, you'll need additional lights, carefully balanced, to cover the entire surface.
- Consistent Light Type: Stick to the same type of lights (e.g., all tungsten or all LED) to ensure consistent color temperature and warmth across your screen and subjects. Mixing light types can lead to color shifts that complicate keying.
- Check with a Waveform Monitor: If you have access to a camera or external monitor with a waveform monitor, use it! This tool visually displays the luminance levels across your image, allowing you to quickly spot inconsistencies or hotspots on your green screen and adjust your lights accordingly.
The Spill Effect: Taming Green Reflections
Green screen spill is the bane of many green screen productions. It happens when the intense green light reflecting off the screen bounces back onto your subjects and objects. This creates a subtle (or not-so-subtle) green tint on their edges, hair, clothing, or even skin, leading to fuzzy "halos" or green outlines that betray the composite. It’s a dead giveaway that your subject isn’t actually in that exotic locale.
The Fix:
- Reduce Screen Saturation: While you need the screen to be bright and even, you don't want it over-saturated with light. Dim your green screen lights slightly if necessary, finding the sweet spot where it's evenly lit without being excessively bright.
- Maximize Distance: Again, distance is paramount. Positioning people and objects at least six feet away from the green screen significantly reduces the amount of green light reflecting back onto them.
- Backlighting for Separation: A well-placed backlight on your subject can work wonders. This light, positioned behind and slightly above your subject (out of frame), creates a subtle rim of light around them, physically separating them from the background. Crucially, ensure this backlight doesn't disrupt the even illumination of your green screen.
- Absorb the Bounce: Use black drapes, black polyboards (foam core), or even black cloth on the floor (if these areas won't be visible in the shot) to absorb green bounce light. Position these strategically on the sides of your set, just outside the camera's view, to catch any stray green light before it hits your subject.
- Counter-Coloring (Advanced): For particularly tricky wide shots where some floor spill around feet might be unavoidable, a subtle, dim tungsten light (which appears orange when dimmed) placed to the sides of the subject can help. The orange light can partially counter the green spill, making it less noticeable. This is an advanced technique and requires careful balancing.
Subject & Wardrobe Considerations: What to Wear (and Avoid)
It's not just about the screen; it's also about what's in front of the screen. Your subject's attire and makeup can either make your life easy or plunge you into an editing quagmire.
Wardrobe Wonders & Makeup Must-Haves: What to Wear (and Avoid)
The most obvious problem: green objects. Any clothing, logos, shoes, or accessories that are green will simply disappear when you key out the background, making your subject look like a floating head or disembodied limbs. Less obvious, but equally problematic, are shiny or reflective surfaces. Shimmery or glossy makeup, metallic jewelry, glitter, or even very shiny clothing can catch and reflect the green screen light, creating unwanted green reflections or shimmering artifacts that are impossible to key cleanly.
The Fix:
- Avoid Green at All Costs: This should be a hard rule. Brief your talent and crew thoroughly: no green clothing, shoes, accessories, or props unless they are meant to disappear.
- Consider a Blue Screen: If green objects are absolutely essential to your shot (e.g., a commercial for a green product, or a plant expert holding a specific green sample), then your best course of action is to switch to a blue screen. Blue is the secondary chroma key color and offers the same benefits without conflicting with green elements.
- Matte is Magic: Encourage talent to use matte makeup. Avoid anything shimmery, glossy, metallic, or glittery. This includes watches, earrings, necklaces, and even certain fabrics. If an essential prop is metallic, consider spraying it with a temporary matte finish.
- Test, Test, Test: Always do a quick test shot with your talent and their wardrobe before committing to a full shoot. A quick glance can reveal potential problems before they escalate.
Camera Techniques for a Flawless Key
Your camera settings and how you frame your shots play a significant role in how cleanly your green screen footage will key. These technical choices can make or break the illusion.
Framing Your Vision: Perspective and Resolution
Incorrect focal length, camera height, or distance can result in a warped perspective, making your subject look unnatural when composited. Think about a full-length shot where your subject's legs appear tapered or distorted – it immediately looks fake. Furthermore, filming static full-length subjects in a standard landscape orientation can waste valuable pixel resolution, forcing you to crop heavily in post and potentially lose detail.
The Fix:
- Match the Background: Always consider your intended background shot first. Match your camera's focal length, height, and angle to what would be natural for that background. If your background is a distant mountain range, don't shoot your subject with a wide-angle lens up close, as the perspectives won't align.
- Longer Lens, Further Back: For presenters or full-length shots, use a longer lens and position the camera further back. This creates a more compressed, straighter perspective, minimizing distortion, especially for vertical lines (like legs).
- Eye-Level or Slightly Below: For full-length shots, placing the camera slightly below eye level can often make the subject appear more grounded and natural within the composite.
- Portrait Mode for Static Full-Length: For static full-length subjects (e.g., a weather presenter, a product demonstrator), rotate your camera 90 degrees to shoot in portrait orientation. This fills the frame vertically, maximizing resolution on your subject. In post-production, you can easily crop for both close-up and wide shots from this high-resolution vertical footage, offering much more versatility than a landscape shot that would require significant upscaling or cropping to achieve a full-length vertical presentation.
Depth of Field: Sharpening Your Subject
A shallow depth of field (shooting with your lens wide open, like F1.8 or F2.8) creates beautiful background blur in traditional filmmaking. However, in green screen work, it can be problematic. Soft, blurry edges on your subject make it incredibly difficult for keying software to distinguish between the subject and the green screen, resulting in fuzzy, unnatural edges when composited with a sharp background. Additionally, stopping down your lens too far (beyond F13-F16) can lead to a phenomenon called iris diffraction, which actually reduces sharpness.
The Fix:
- Aim for Greater Depth of Field: You want all of your subject to be in sharp focus. This means stopping down your lens (increasing your f-number) to achieve a greater depth of field.
- Find the Sweet Spot: Most lenses have a "sweet spot" for optimal sharpness, typically around F8 to F11. Shooting within this range provides excellent sharpness, minimizes vignetting (darkening at the edges of the frame), and gives the keying software clear, defined edges to work with.
- Compensate with Light: Stopping down your lens means less light hits the sensor. You'll need to compensate by ensuring you have sufficient lighting on both your green screen and your subject.
- Keep ISO Low: Always keep your camera's ISO as low as possible to minimize digital noise, which can further complicate keying, especially around fine details like hair.
Capturing Motion: Taming Blur for Clear Keys
Fast-moving objects, especially hands or hair, can create motion blur. While natural in a live shot, this blur can cause parts of the subject to merge with the green background, making it extremely difficult for the keying software to differentiate and remove the green cleanly. The result is often ghosting, holes, or choppy edges in the composite.
The Fix:
- Increase Shutter Speed: The most direct solution is to increase your camera's shutter speed during shooting. A faster shutter speed will "freeze" motion more effectively, reducing blur on fast-moving elements. While this might make the live-action footage look slightly less natural due to reduced motion blur, it gives your keying software cleaner edges to work with.
- Higher Frame Rates: Capturing more frames per second (e.g., 60fps) during shooting can also help. In post-production, you can then interpret fewer frames per second (e.g., 24fps or 30fps) and speed them up. This provides more individual frames where motion is frozen.
- Add Motion Blur in Post: After achieving a clean key, you can (and often should) add motion blur back into the composite in post-production. This step helps the keyed subject blend more naturally into the background footage and restores a natural flow to movements without compromising the initial key.
Advanced Considerations & Post-Production Prep
Sometimes, simply avoiding errors isn't enough. You need to proactively set up your shot for the best possible post-production outcome, even anticipating complex fixes.
Lighting for Your Star: Prioritizing the Subject
It's easy to get so caught up in meticulously lighting the green screen that you forget about the most important element: your subject. Obsessing over a perfectly even green screen at the expense of properly lighting your subject to match the intended background is a classic mistake. Your subject will look out of place, no matter how clean the key.
The Fix:
- Match Background Lighting: Always light your subject specifically to match the chosen background. If your background is a sunny outdoor scene, use hard, bright, warm lights on your subject. If it's a moody interior, use softer, cooler, or more dramatic lighting. The goal is seamless integration.
- Isolate Screen Lighting: You can reduce shadows on the green screen without compromising your subject's lighting. This goes back to distance, careful light placement, and using black flags or polyboards to prevent light from spilling where it shouldn't.
- Manual Masking as a Last Resort: For extremely complex or wide full-length shots, especially those involving tricky movements near the floor where minor shadows around feet might be unavoidable, be prepared for some manual masking (rotoscoping) in post-production. Communicate this expectation to your editor early on.
Choosing Your Recording Mode: LOG vs. Standard Gamma
Modern cameras offer various recording modes, including standard gamma profiles (like Rec. 709) and flatter "LOG" profiles (like S-Log, C-Log, V-Log). While LOG offers greater dynamic range and color grading flexibility, it can sometimes be less optimal for green screen keying. LOG footage captures less color data per level of brightness, and if underexposed, it can introduce noise into the shadows, making the green screen harder to separate.
The Fix:
- Standard Gamma Often Better: For most green screen work, especially if you're not color grading extensively, shooting in a more standard video gamma can actually yield a better key. These profiles provide more saturated, concentrated color data, making it easier for keying software to identify and remove the green.
- Expose LOG Brightly: If you must shoot in LOG (perhaps to match existing LOG footage, or because it's part of a larger, LOG-shot project), expose your footage brightly. Overexposing LOG by about one or two stops (often called "expose to the right") helps push noise out of the shadows and provides more usable color information for keying.
- RAW is King (But Demanding): For the absolute best possible key and maximum flexibility, RAW recording is ideal. It captures the most data possible, providing unparalleled control in post-production. However, RAW requires significant hard drive space and a robust post-production workflow.
- Communicate with Your Team: Always discuss your recording mode choices and requirements with your editor, graphic artist, and Director of Photography (DOP) before shooting. Ensuring everyone is on the same page will prevent costly surprises. This collaborative approach also applies to broader technical issues, as troubleshooting problems like a troublesome laptop green screen might require coordinated effort across different technical domains.
The Final Cut: Actionable Steps for Flawless Composites
Achieving a clean green screen composite isn't about magic; it's about meticulous planning and execution. By focusing on these core principles, you're not just preventing future green screen errors; you're actively building a foundation for visually stunning, professional-grade results.
Remember, practice makes perfect. Set up your green screen, experiment with lighting, and do test shots with different camera settings and talent outfits. Analyze the results in your editing software, identifying areas for improvement. Every shoot is a learning opportunity. With each refined setup and thoughtful adjustment, you'll gain the confidence and expertise to create composites that truly transport your audience, making your green screen a powerful tool for boundless creativity rather than a source of frustration. Your future self (and your editor) will thank you.